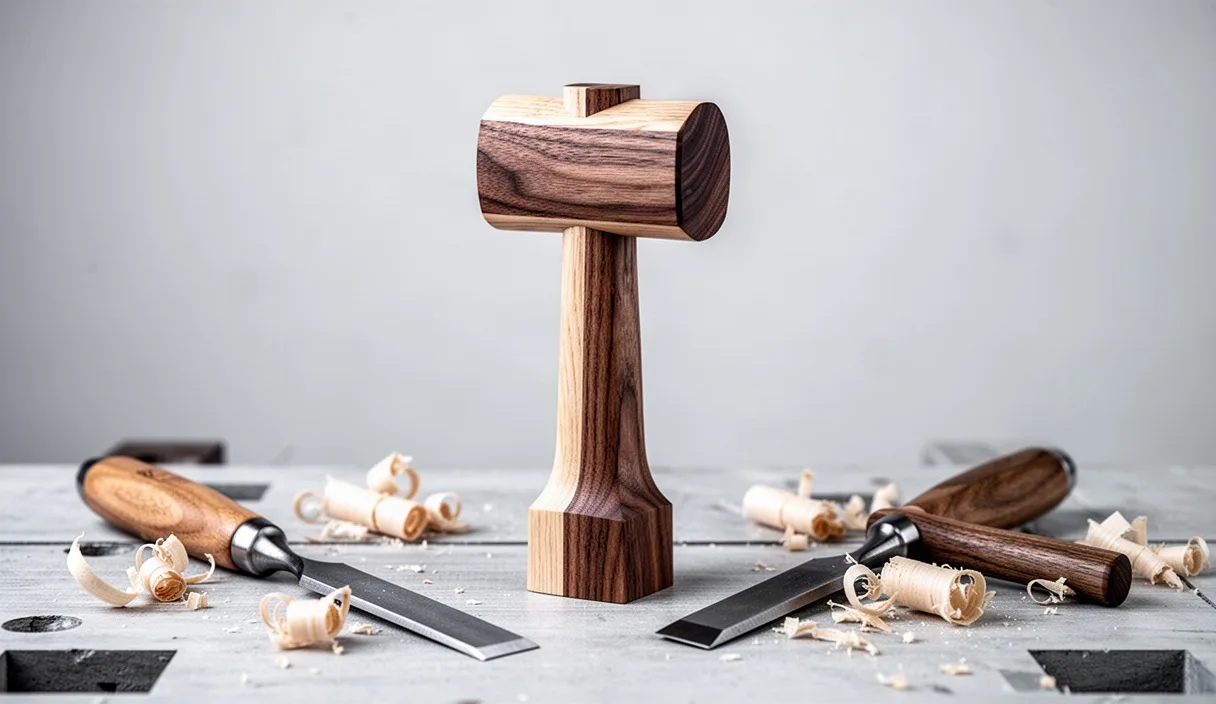

When you stand at the workbench preparing to chop a mortise or pare the shoulder of a tenon, the tool you reach for to drive your chisel sets the tone for the entire cut. A metal hammer may drive a nail with sharp authority, but bringing forged steel down onto the wooden handle of a fine chisel produces a harsh, skittering vibration. A wooden mallet, by contrast, meets the chisel with a solid, muted thud that transfers energy forward while keeping your hands and tool handles intact.
Making your own joinery mallet is one of the most rewarding early projects you can undertake. It demands modest stock, allows you to practice foundational sawing and shaping, and yields a tool you will use on nearly every subsequent project. By understanding the physics of energy transfer, selecting appropriate lumber, and shaping the parts to work with human biomechanics, you can build a striking tool that will last for generations.
Why wooden mallets strike cleaner blows than steel hammers
Why does a steel claw hammer feel so jarring when struck against a chisel? The answer lies in how two colliding bodies exchange kinetic energy. Think of a steel hammer hitting a chisel like a golf ball striking a sidewalk. Steel is exceptionally rigid, so the contact between the hammer and the chisel handle lasts only a few microseconds. In that tiny sliver of time, the steel transfers an abrupt shock wave into the tool. That shock wave does two undesirable things: it sends a harsh rebound back into your forearm, and it violently crushes the fibers on the end of your chisel handle, eventually mushrooming and splitting the wood.
A wooden mallet behaves more like a leather baseball glove catching a fastball. Because wood fibers are slightly compressible, they yield minutely upon contact. Woodworkers refer to this duration of contact as dwell time. Dwell time is simply the brief window, measured in milliseconds, during which the mallet face and the chisel handle stay pressed together during the swing. Because a wooden mallet increases dwell time, the energy does not snap into the chisel like an electric shock. Instead, it pushes the cutting edge through the wood grain in a controlled, continuous wave.
This prolonged energy transfer gives you substantially better control over cutting depth. When you tap a chisel with a wooden head, you can feel through the chisel handle whether the cutting edge has bottomed out or met resistance from unruly grain. With steel, the instant rebound robs you of that tactile feedback, leaving your hand stinging and your cut imprecise.
Picking dense hardwoods that resist split and denting
A good mallet head requires wood with high density and excellent shock resistance. If you choose a soft timber like white pine or poplar, the mallet face will dent and chew itself to pieces within an afternoon of heavy chopping. Conversely, if you select an excessively brittle wood, the head may crack along the growth rings under repeated impact.
To measure wood hardness, timber specialists use the Janka hardness scale. The Janka rating represents the amount of force, measured in pounds-force (lbf), needed to embed a 0.444-inch steel sphere halfway into a sample piece of wood. For a durable bench mallet, you generally want a species with a Janka rating above 1200 lbf that also features a tight, interlaced grain structure.
| Wood Species | Janka Rating (lbf) | Split Resistance | Common Workshop Role |
|---|---|---|---|
| Sugar Maple (Hard Maple) | 1450 | Very High | Bench mallet heads, chopping blocks |
| European Beech | 1300 | High | Traditional joiner mallets, workbench tops |
| White Oak | 1360 | Moderate to High | Heavy timber-framing mallets, tool totes |
| Shagbark Hickory | 1820 | Exceptional | Striking handles, sledge heads |
| Black Walnut | 1010 | Moderate | Accent veneers, light carving mallets |
Sugar Maple and European Beech are the historical gold standards for mallet heads. Their diffuse-porous structure means the pore vessels are small and evenly distributed throughout the earlywood and latewood. As a result, they wear down smoothly through friction rather than flaking off in splinters. Hickory is unrivaled for handles because its long, flexible fibers absorb whipping forces without snapping along the grain line.
Laminating the mallet head or cutting a solid block
Before cutting any lumber, you must decide how to form the mallet head. You have two distinct paths: laminating three separate pieces of board stock together, or carving a single solid block of hardwood. Both approaches produce a functional tool, but they require different methods and toolsets.
The laminated approach is ideal if you have a modest kit of hand tools or want to bypass deep mortising. A mortise is an interior pocket cut into wood to receive a corresponding tenon or handle. In a laminated mallet, you create this mortise without chopping. You start with three pieces of stock, usually about 0.75 to 1 inch thick each. The two outer pieces form the solid striking cheeks. The middle board is cut into two distinct wedges, with a gap left between them. When you glue the outer cheeks to the middle pieces, that gap naturally becomes a tapered mortise. You achieve a precise interior cavity using only simple crosscuts and wood glue.
The solid block approach involves taking a single billet of timber, roughly 3 inches thick, 5 inches long, and 6 inches tall, and boring the mortise out by hand or drill press. Cutting a through-mortise in solid hard maple demands a sharp auger bit or Forstner bit to remove the core waste, followed by patient paring with a sturdy corner-clearing chisel. The advantage of the solid head is structural purity. There are no glue lines running parallel to the striking face. While modern polyvinyl acetate (PVA) wood glues form bonds stronger than the wood itself, heavy, off-axis strikes on a laminated mallet can eventually subject glue lines to shearing stresses that solid wood naturally resists.
Shaping a tapered mortise for a self-locking handle
How does a mallet handle stay attached without screws, pins, or metal wedges? The answer is a self-locking tapered mortise. This design operates on the exact same physical principle as a miner's pickaxe. The mortise pocket inside the head is narrower at the bottom and wider at the top. The handle mirrors this profile, widening gently toward its upper tip.
To assemble the tool, you slide the handle in through the top of the mallet head rather than pushing it up from the bottom. Because the handle tip is wider than the bottom exit hole of the head, the head cannot fly off. Every time you swing the mallet downward and strike a chisel, the sudden stop forces the mass of the head further upward onto the widening taper of the handle. The harder you work the mallet, the tighter the joint seats itself.
To lay out and cut a tapered mortise in a solid head, follow this sequence:
- Mark the center lines on both the top and bottom faces of your mallet head block.
- Lay out a rectangular opening on the bottom face that measures roughly 1 inch by 1.25 inches.
- Lay out an enlarged rectangular opening on the top face that measures roughly 1.125 inches by 1.375 inches. This difference establishes a gentle taper of roughly 2 to 3 degrees along the front and back walls of the mortise.
- Secure the block in a bench vise. Using a 0.75-inch drill bit or auger, bore vertical waste holes straight through from top to bottom, staying strictly inside your layout lines.
- Seat a wide bench chisel on your top layout line and pare downward toward the bottom line, checking your progress regularly with a small sliding bevel gauge set to your intended taper angle.
- Check your handle stock frequently against the mortise by rubbing carpenter pencil graphite inside the walls. Slide the handle into place; the pencil graphite will transfer onto the high spots of the handle, showing you precisely where wood needs to be shaved away for an even fit.
Angling the striking faces to match arm swing mechanics
If you look at an inexpensive mass-produced mallet, the striking faces are often cut perfectly perpendicular to the top and bottom of the head, forming 90-degree right angles to the handle. This seems intuitive until you examine the geometry of the human body in motion.
When you strike a chisel held upright on a workbench, your hand does not travel in a flat, straight line. Your forearm pivots around your elbow, and your hand pivots around your wrist. The mallet head travels through an arc. If the striking face of the mallet were square at 90 degrees, the bottom edge of the mallet face would make contact with the chisel first, striking it at a sharp tilt. This off-center blow damages the butt of the chisel and deflects the force sideways, making your cuts wander.
To achieve a square, flush blow when the mallet meets the chisel, the striking faces of the head must angle inward toward the handle. For a standard bench mallet with an overall handle length between 11 and 13 inches, an inward angle between 2 degrees and 4 degrees works best. When you swing down toward a workpiece clamped 36 inches above the floor, that 3-degree inward tilt brings the face of the mallet exactly parallel to the vertical chisel at the exact moment of impact. The entire surface area of the wooden face engages the chisel handle, delivering an even, predictable push.
Rounding handle edges to reduce hand fatigue
Woodworkers often spend days perfecting the joinery of a tool only to leave the handle as an abrasive, four-sided stick. A square handle with sharp corners concentrates pressure into the joints of your fingers and the palm of your hand, leading to blisters and hand cramps after twenty minutes of mortising. Yet, turning the handle completely round on a lathe creates a different problem: a round handle provides no spatial awareness.
Your hands have incredible sensitivity to geometry. When you hold an oval or octagonal handle, your fingers immediately register the flat sides, telling your brain the exact orientation of the striking face without requiring you to look down at the tool. This sensory feedback is called indexing.
To produce an ergonomic handle that indexes naturally in the palm:
- Plane your raw handle blank to a rectangular cross section roughly 0.875 inches thick by 1.25 inches wide, leaving the wider dimension aligned with the striking direction.
- Use a marking gauge to scribe layout lines 0.1875 inches away from each corner edge along the length of the grip area.
- Secure the handle in your bench vise and use a hand plane, rasp, or spokeshave to remove the four sharp corners down to your layout lines, transforming the rectangle into an eight-sided octagon.
- Take a fine rasp or cabinet scraper and lightly soften the remaining eight ridge lines until the cross section feels like a rounded, comfortable egg in your grip.
- Thin the handle slightly just beneath the head, leaving a gentle flare at the very base of the handle. That bottom flare prevents the mallet from slipping out of your sweaty palm during repetitive work.
Finish the handle with a drying oil, such as boiled linseed oil or pure tung oil, followed by a coat of paste wax. Avoid heavy film finishes like polyurethane or thick shellac. Film finishes create a slick, plastic barrier that traps perspiration against your skin, causing friction blisters. Oil and wax sink directly into the pores, leaving a warm, tactile grip that becomes more comfortable the longer you use it.
Common mistakes
Even in a straightforward build, small layout errors can ruin the functionality of the mallet. Watching for these common missteps will save your stock and your patience:
- Orienting the grain incorrectly on the head: Never construct a mallet so that the chisel strikes the end grain of the mallet head. End grain against end grain causes the mallet to split apart rapidly along its growth rings. The striking face must always be the side grain or edge grain of the timber.
- Reversing the mortise taper: Take time to double-check which side of your block is the top before cutting. If you accidentally cut the wide part of the mortise at the bottom of the head and the narrow opening at the top, the head will fly off the handle the first time you swing it.
- Over-thinning the handle: It is easy to remove too much material when shaping the grip. A handle that is too thin will flex during heavy chopping, robbing your strike of power and causing hand fatigue as your fingers over-grip the slender wood.
- Using fast-setting brittle glue on laminations: If you laminate your mallet head, use standard yellow PVA wood glue or liquid hide glue. Avoid five-minute epoxies or cyanoacrylate (super glue), which dry into glass-like brittle layers that can shatter under repeated, heavy concussive impacts.
Next steps for your bench build
To begin building your mallet, head to your scrap bin or local hardwood dealer and select a clear, straight-grained offcut of beech, maple, or oak that measures at least 3 inches thick by 6 inches long. Set your sliding bevel gauge to 87 degrees, which provides your 3-degree inward face angle, and use a pencil to draft the full-scale side profile of your mallet head onto a piece of card stock or thin plywood.
Once you have drawn your pattern, check the balance of your proposed dimensions by holding the blank in your hand. If the head feels too front-heavy for your frame, reduce the length by half an inch. Once your template feels right, transfer the layout lines directly onto your trued stock, make your first saw cuts, and enjoy the process of crafting the primary striking tool for your workshop bench.