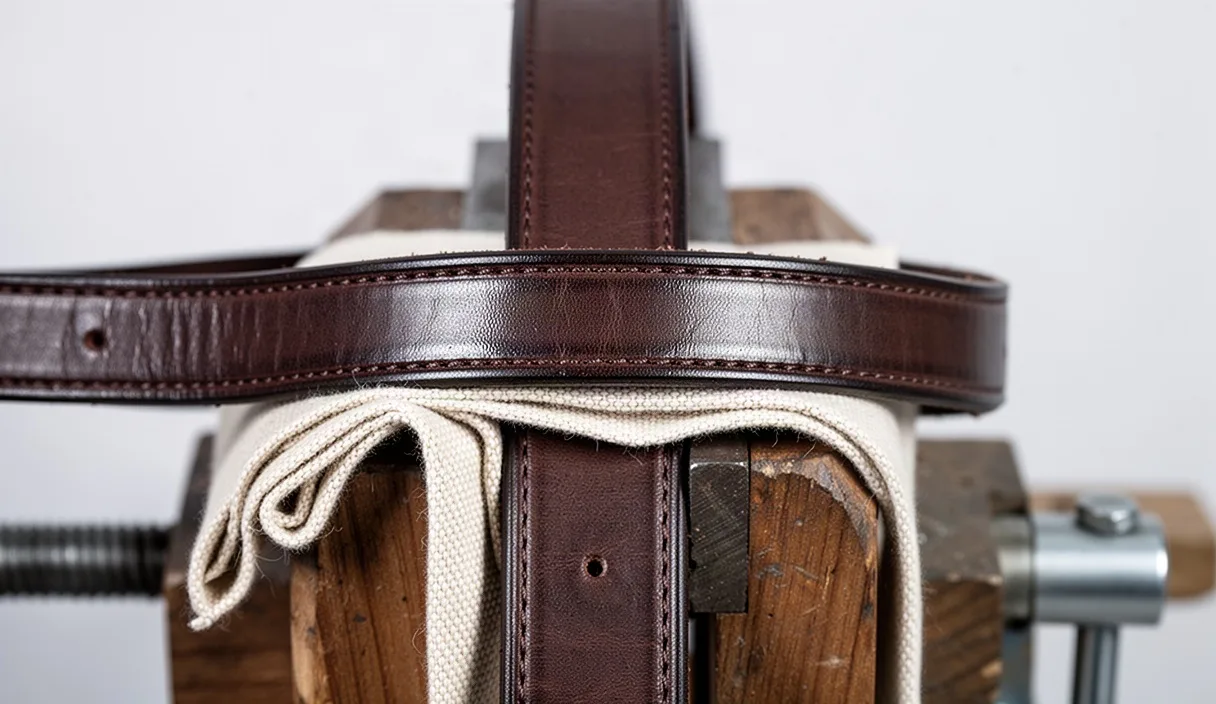
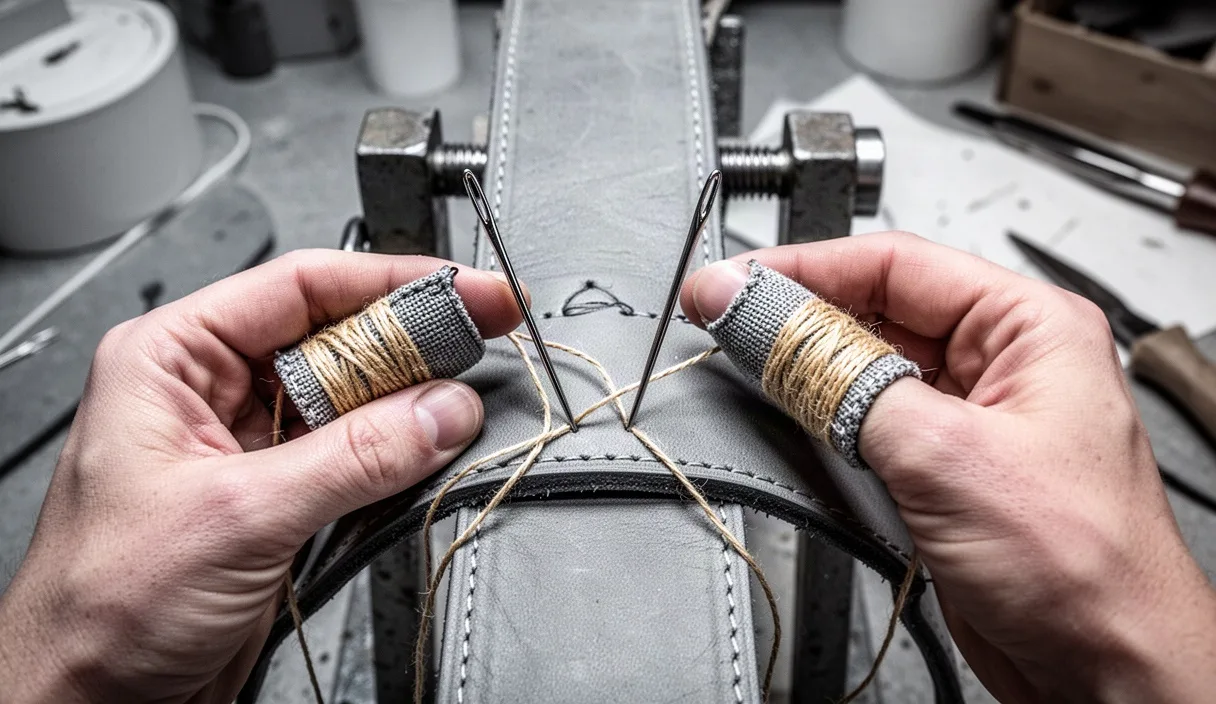

Every leather item that endures decades of hard use shares a quiet secret: the way its pieces are joined together. When you look closely at a hand-sewn boot, a heavy belt, or a handmade wallet, you are usually looking at a traditional saddle stitch. This technique requires two needles attached to opposite ends of a single length of thread, passing through the exact same hole from opposite sides. It is a slow, rhythmic process that demands your attention, but it yields a seam that no home sewing machine can replicate.
Why do leathercrafters spend hours stitching by hand when automated machines can sew a seam in ten seconds? A sewing machine operates on a system of loops that interlock inside the material. If that machine thread snaps anywhere along the seam, the tension releases, and the entire row can pull apart like the string on a feed sack. The two-needle saddle stitch works under an entirely different mechanical logic. By understanding how the thread sits inside the leather and mastering the physical choreography of the needles, you can create goods that stay intact even after years of friction, sweat, and strain.
Why saddle stitches resist unraveling after thread wear
To understand why this stitch is so resilient, imagine two people holding hands through an open window. Each person represents a separate thread, and the window represents the hole punched through the leather. Person A holds one strand on the left side of the leather, and Person B holds the other strand on the right side. Both strands travel through the hole, cross past each other, and pull taut. They do not twist together or knot inside the opening; instead, they run parallel across the thickness of the leather, creating two complete, mirror-image stitch lines running down both faces of the project.
What happens when the thread wears down from friction? Consider a wallet pocket that slides in and out of denim jeans several times a day. Eventually, the outer surface of the thread will abrade and snap. In a machine lockstitch, the broken strand drops its hold on the bobbin thread below, causing the opposing thread to loosen immediately across adjacent holes. In a hand-sewn saddle stitch, the thread passing through the interior remains clamped by the pressure of the leather fibers. Even if the stitch on the front face wears away entirely, the thread on the back face continues to hold the two pieces of leather firmly together.
| Feature | Machine Lockstitch | Hand Saddle Stitch |
|---|---|---|
| Thread construction | Two separate threads meeting in the middle | One continuous thread with a needle at each end |
| Failure behavior | Unravels progressively when a single stitch breaks | Remains pinned inside adjacent holes |
| Tension source | Machine tension discs and bobbin spring | Manual pull adjusted for each individual hole |
| Repairability | Requires pulling out the loose run and restitching | Can be spot-secured without unthreading the seam |
The friction generated by the leather itself plays a major role in this durability. When you punch a clean hole through vegetable-tanned leather, the collagen fibers compress. As the two strands of waxed thread enter the hole, they pack that void tightly. The wax coats the fibers and creates a mechanical seal. Water, grit, and pocket lint struggle to enter the seam, which protects both the inner thread core and the raw interior of the leather from premature rot.
Preparing waxed thread and mounting twin needles
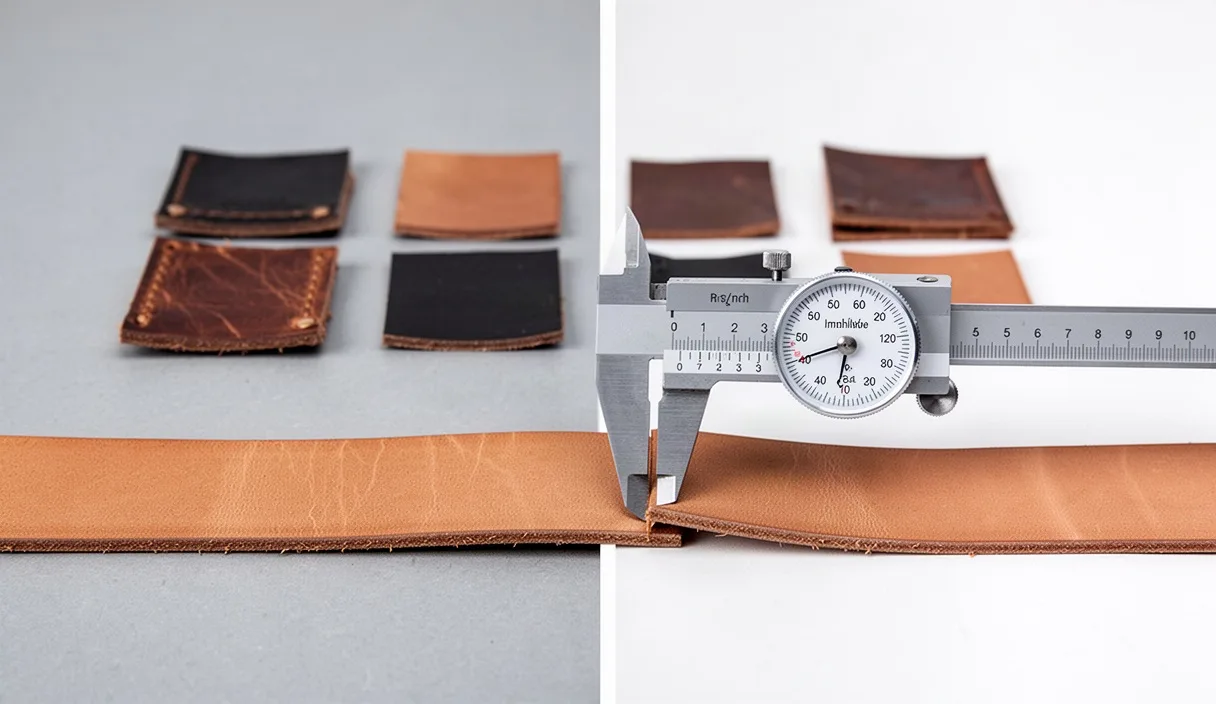
A successful stitch line begins before you ever touch the leather. First, you must determine how much thread to cut. If you cut too little, you run out of thread halfway down your seam and have to tie off mid-panel. If you cut too much, you spend unnecessary energy pulling long tails through every single hole, which frays the thread fibers through excessive friction. For most flat goods using leather between 1.2 mm and 2.0 mm thick, measure out four times the length of the seam you plan to stitch. If you are joining thick boot soles or multiple layers of heavy strap leather totaling 5.0 mm or more, increase that measurement to five or six times the seam length.
The choice of thread matters just as much as its length. Braided polyester thread, such as 0.5 mm or 0.6 mm diameter cord, offers high tensile strength and resists rot from moisture. Traditionalists often prefer twisted linen thread, which settles into the leather with a classic matte look. Whichever you choose, the thread must be lightly waxed. Wax lubricates the passage through dense leather and binds loose fibers together. If your spool came untreated, pull the strand across a block of natural beeswax twice, then rub the thread briskly through a scrap of canvas to melt the wax into the core using friction heat.
Now, how do you attach the needles so they never slide off during stitching? Crafters use blunt-tipped harness needles, typically size 2 or size 4 for everyday work. Unlike sharp fabric needles, harness needles have rounded tips that glide through pre-punched holes without cutting into the surrounding leather. Mount the needles using the standard leathercrafter lock:
- Pass roughly 50 mm of thread through the eye of the first needle.
- Take the point of the needle and pierce it straight through the center of that 50 mm tail, roughly 15 mm away from the eye.
- Pierce the needle through the tail a second time, roughly 5 mm closer to the cut end. You now have two thread loops impaled on the needle shaft.
- Grasp the long body of the thread with one hand and slide the pierced loops over the needle eye and down onto the main strand, pulling firmly to snug down the small knot.
- Repeat this exact process on the opposite end of the thread with your second needle.
This lock creates a slim profile that passes through small holes without hanging up on the edges, while guaranteeing that the needle cannot separate from the thread when you pull hard on the seam.
Piercing cleanly with an awl or pricking iron
Uniform stitches require uniform holes. You cannot push a blunt harness needle through solid leather without an opening already prepared. Crafters use either pricking irons, stitching chisels, or a diamond-shaped stitching awl to create these passages. Pricking irons with a spacing of 3.85 mm or 4.0 mm between teeth are ideal for small leather goods, producing clean, angled slits that guide the thread into a slanted pattern.
When using pricking irons, position your leather on a dense polyethylene cutting board or a thick piece of scrap sole leather. Never punch directly over metal or stone, as this ruins the polished teeth of your iron. Hold the tool perfectly vertical, perpendicular to the face of the leather in both directions. If the tool leans even two degrees toward you or away from you, the teeth will exit the back of the leather at an uneven distance from the edge. Strike the tool with a dead-blow mallet or wooden maul using one or two firm, controlled taps. You want the teeth to pierce entirely through the layers without driving deep into your cutting board.
What if you prefer to use a traditional diamond awl? An awl gives you freedom to work on curved seams, box stitches, and thick saddlery where irons cannot easily reach. The blade of a stitching awl must be razor-sharp and polished to a mirror shine. A dull awl tears the leather fibers instead of parting them, leaving rough, gaping holes. When piercing with an awl, hold the blade at a steady 45-degree angle to the seam line. Push the blade through with smooth, even pressure, keeping your fingers clear of the exit path on the back side. The diamond shape creates a slit with two acute corners, which cradle the threads and produce the characteristic slanted look of fine leatherwork.
Passing needles without splitting the thread core
With your leather secured in a stitching pony, a wooden clamp that rests between your knees, your hands are free to coordinate the needles. Position the project so that the front face of the leather faces to your right, assuming you stitch from back to front, or facing your dominant hand. We will refer to the sides as the front needle and the back needle. Push the first needle through the starting hole and pull the thread until both tails are equal in length.
To begin the sequence, push the needle from the front side through the next hole. Push it through just enough so that 20 mm of the needle point emerges on the back side. Grip that protruding point with the thumb and forefinger of your back hand and pull it through. As you pull, keep the thread pinned toward the bottom corner of the diamond slit. This deliberate positioning clears space in the hole for the incoming second needle.
Here is where many beginners struggle: how do you prevent the second needle from piercing the strand of thread that is already inside that hole? If your second needle passes through the fibers of the first thread, you will lock the strands together. When that happens, you cannot pull the stitch tight, and you cannot easily reverse your work to correct errors. To prevent this, insert the second needle into the top corner of the hole, well away from where the first thread rests. Before you push it all the way through, pull the first thread backward gently by about 25 mm. If the second needle has caught the core of the first thread, you will feel the needle pull backward along with it. If the needle slides smoothly without moving the first thread, the passage is clear.
- Insert the front needle through the bottom of the slit.
- Draw the needle through, holding the thread down and back toward you.
- Insert the back needle through the top of the slit.
- Perform the pull-back test to verify that the thread core remains intact.
- Push the back needle completely through to the front side.
- Pull both needles outward simultaneously with equal, controlled tension.
Casting the thread to keep the stitch angle uniform
Have you ever noticed a handmade seam where the stitches slant gracefully on the front side, but lie flat or slant haphazardly on the back? That inconsistency comes from failing to cast the thread. In leatherwork, a cast is a deliberate half-loop made during the passage of the second needle. It forces the back thread to sit consistently on top of the front thread within the hole, mirroring the slant on both faces of the project.
To cast the thread, watch the back needle as it enters the leather. As the tip of this needle passes through to the front side, you will have a loop of thread hanging down from the first pass. Take the body of the back thread and drop it over the shaft of the front needle before you pull that needle completely out of the hole. Some crafters prefer to loop it clockwise; others counter-clockwise. The exact direction matters less than absolute consistency: you must perform the exact same loop on every single stitch across the entire panel.
Once the needles have traded sides, tensioning the stitch locks the angle in place. Pull both hands outward, away from the leather, at a slight diagonal angle that matches the slant of your pricking iron slits. If your iron cuts at a 45-degree angle toward the lower right, pull your front hand slightly downward and your back hand slightly upward. Apply steady, moderate force. You want to snug the thread firmly against the leather fibers without stretching the material or puckering the edge of the panel. If you pull too hard on thin leather, the stitch line will create an unsightly ditch along the seam.
Locking the final stitches without bulky knots
When you reach the end of your seam, you cannot tie an ordinary knot. An exposed knot on leather catches on pockets, frays rapidly, and looks unrefined. Instead, hand leathercrafters secure the seam using backstitching, which relies on the friction of double-threaded holes to lock the seam permanently.
When you finish your final hole, do not cut the thread. Turn your direction around and sew backward across the last two or three holes you just completed. Insert the needle into the previous hole, following the exact same path the original thread took. Because there is already a full saddle stitch resting inside that hole, the space will be tight. Work the needle through patiently, gently wiggling the blunt tip past the existing fibers. If the fit is very snug, use a pair of smooth-jawed craft pliers to pull the needle through, taking care not to scratch the leather surface.
After completing two or three backstitches, both needle tails should end on the back side of the work, or inside an unexposed lining layer if the project design allows. Pull the threads firmly to ensure the backstitches sit flush within the existing stitch channel. From here, your method of trimming depends entirely on the thread material you chose at the start:
- Synthetic thread (polyester or nylon): Trim the thread tails with a sharp knife or thread snips, leaving roughly 1.5 mm protruding from the surface. Use a thread burner or the very low flame of a lighter to melt the nub down until it reaches the leather surface, then immediately press the molten bead with a brass modeling tool or your smooth metal lighter case to mushroom it flat against the hole.
- Natural thread (linen or cotton): Natural fibers will not melt; they simply burn into ash. For linen, apply a tiny drop of polyvinyl acetate leather glue to the base of the hole using the tip of an awl. Pull the thread taut, slice it completely flush with a fresh scalpel blade, and push the remaining tip back into the hole with the awl. The glue hardens around the fibers inside the channel, locking them securely.
Common mistakes in saddle stitching
Small variations in hand movement produce noticeable defects in the finished leather good. Identifying these early helps you build cleaner habits at the pony.
- Piercing the existing thread: Forgetting the pull-back test causes needles to spear through the opposing strand. This results in threads bunching up outside the hole and prevents proper tensioning. If you spear the thread, pull the needle back out immediately and re-enter the hole.
- Inconsistent needle ordering: If you pass the left needle first on stitch one, and then pass the right needle first on stitch two, your stitch slant will wobble back and forth like a zig-zag line. Pick one side to lead every single stitch, and stick to that rule until the project is finished.
- Varying your pull tension: Pulling one stitch with ten pounds of force and the next with five pounds produces an uneven, bumpy surface. Keep your shoulders relaxed and establish a steady, identical pull at the end of each pass.
- Misaligned awl punches: Punching holes at changing angles causes the back face of your stitch line to wander up and down. Keep your awl blade flat and level relative to the edge of the leather throughout the entire run.
Putting your stitching technique into practice
The best way to build muscle memory for this process is to step away from expensive project panels and prepare a practice strip. Cut two strips of 2.0 mm thick vegetable-tanned scrap leather, roughly 40 mm wide and 150 mm long. Glue them together along the long edge using a water-based leather contact cement, keeping the adhesive strip roughly 10 mm wide. Use a wing divider set to 4.0 mm to scribe a light guide line parallel to the edge, then punch your stitch holes cleanly down that line using your pricking irons.
Mount the test strip in your stitching pony, cut your thread, and stitch the entire length without stopping to check your phone or rush the pace. Pay close attention to your rhythm: needle in, draw back, second needle in, cast the loop, pull taut. When you reach the end, examine both sides under a strong raking light. Look for straightness, uniform slant, and consistent tension. If you notice a stitch that sits flat or crooked, pull your thread out, identify which step deviated from the sequence, and run the line again. Saddle stitching is a physical skill that improves through focused repetition, rewarding your patience with seams that last longer than the leather itself.