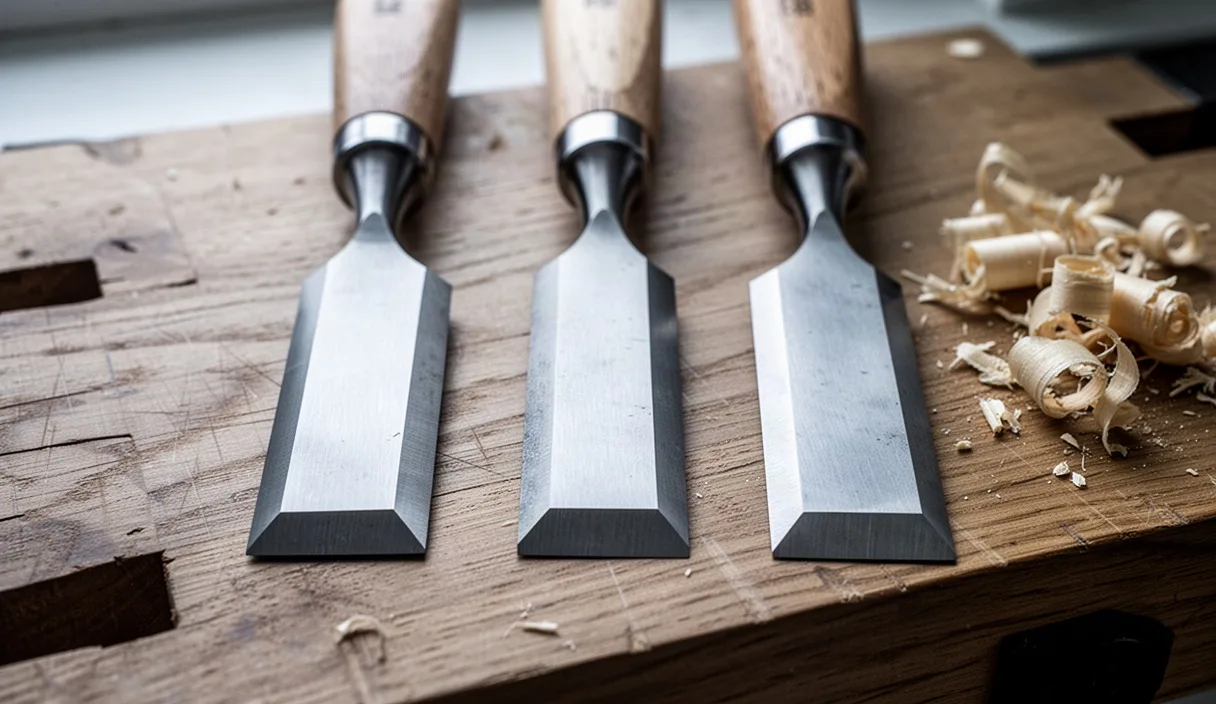

When you hold a wood chisel, you hold a simple wedge of hardened steel attached to a wooden or plastic handle. It looks like an uncomplicated tool, but the angle ground onto that piece of steel dictates almost everything about how the tool behaves in wood. If the angle is too low, the edge feels sharp enough to shave with, yet it folds like foil the moment you strike it with a wooden mallet. If the angle is too steep, the edge remains durable, but pushing it through wood feels like driving an axe into a log.
Why does a change of just five degrees alter the personality of a chisel so dramatically? The answer comes down to geometry, leverage, and the internal structure of hardened tool steel. Learning how bevel angles work allows you to tune your tools for the specific tasks you face at the workbench, whether you are paring delicate shavings from an alder drawer bottom or mortising dense white oak for a dining table base.
What happens to steel fibers under cutting pressure
To understand chisel bevels, you first need to look at what happens at the apex where the flat back of the chisel meets the angled bevel face. In metallurgy, tool steel is made of iron alloyed with carbon and other elements like chromium or vanadium. When heated and quenched, these elements form a crystalline grid called martensite. While we often speak of steel as solid, at the microscopic level that ultra-thin cutting edge behaves like a cantilevered beam. As the edge penetrates wood, the wood fibers push back against the steel with immense concentrated force.
What happens when the cutting wedge enters the wood? Two competing forces appear immediately: clearance resistance and lateral deflection. The front bevel acts as an inclined plane that forces severed wood cells upward and away. As the severed shaving bends, it exerts a downward and backward force against the very tip of the blade. Think of it like pushing a snow shovel into packed snow. If the shovel blade is thin sheet aluminum, hitting a patch of ice will bend the lip backward. If the shovel is heavy cast steel, the edge holds its shape, though you must push harder to move it forward.
In a chisel, the steel behind the cutting apex provides structural support. A wide angle means there is more metal directly behind the tip to absorb compressive loads. When you strike a chisel with a mallet, compressive loads can easily exceed twenty thousand pounds per square inch at the contact point. If the angle lacks sufficient mass, the steel bends past its elastic limit, causing the edge to roll over. If the steel is hardened to a high Rockwell hardness rating (such as 60 to 62 HRC) and cannot bend, it will chip instead, leaving tiny microscopic craters that tear wood fibers rather than severing them cleanly.
Paring cuts: why shallow angles slice cleanly
A paring cut is a cut driven solely by human hand strength, without the assistance of a mallet or hammer. You use paring cuts to trim tenon cheeks to fit a mortise, adjust the shoulders of a joint, or clean up the bottom of a shallow recess. For these cuts, woodworkers routinely grind chisels to a shallow primary bevel, usually between 20 degrees and 25 degrees.
Why does a shallow angle cut so much more easily by hand? The reason is mechanical advantage. A 20-degree wedge lifts wood fibers gradually. Because the slope is gentle, the wood offers far less friction along the bevel face. The energy you apply with your chest and arms goes directly into severing the cell walls of the wood rather than overcoming frictional drag. The chisel enters the material with minimal effort, leaving behind a burnished, glass-like surface.
However, that low angle comes with a distinct trade-off in edge longevity. At 20 degrees, the wedge of steel at the apex is very thin. You can observe the practical differences between low and steep angles when performing hand work:
- Low cutting resistance: A 20-degree chisel requires roughly a third less forward thrust than a 30-degree chisel to slice across softwood grain.
- High risk of deflection: Because the blade tip is thin, cutting into a knot or reversing grain can cause the edge to follow the path of least resistance, pulling the tool off your intended cut line.
- Rapid edge degradation: If you use a 20-degree chisel in abrasive or dense hardwoods like hard maple, hickory, or bubinga, the thin apex dulls quickly from abrasion and micro-chipping.
Because of these traits, dedicated paring chisels are kept strictly for light, controlled shaving. Striking a 20-degree edge with a brass or wooden mallet is almost guaranteed to ruin the edge in a single blow.
Chopping cuts: why steep angles resist chipping
Chopping is the direct opposite of paring. When chopping, you position the chisel vertically or near-vertically and strike the end of the handle with a mallet. This is the classic technique for removing waste between dovetails and chopping out deep mortises. The forces involved are sudden, severe, and dynamic.
Why do chopping cuts require angles between 30 degrees and 35 degrees? Consider what happens when you split firewood with a wedge. A narrow, thin splitting wedge sinks deep into the log and gets stuck because the sides do not push the wood apart quickly enough. A wide, blunt wedge enters slightly, splits the grain apart ahead of the tip, and survives repeated hammer blows without deforming. A 35-degree chisel works on the exact same principle.
| Bevel Angle | Primary Intended Use | Primary Advantages | Primary Limitations |
|---|---|---|---|
| 20 to 22 degrees | Fine hand paring, softwoods | Extremely low pushing effort, exceptional surface finish | Prone to chipping; never strike with a mallet |
| 25 degrees | General bench paring, light cuts | Good balance for hand-pushing in moderate hardwoods | Can fold or chip under heavy mallet strikes |
| 30 degrees | General bench joinery, light chopping | Strong edge, versatile for push cuts and moderate mallet use | Noticeably harder to push by hand than a 25-degree edge |
| 35 degrees | Heavy mortising, tough hardwoods | Maximum support behind the apex; resists chipping on impact | Crushes end grain if pushed purely by hand; requires mallet power |
At 35 degrees, the volume of steel directly behind the cutting tip is substantially greater than at 20 degrees. When the mallet drives the edge into the wood, the shock wave travels up through a broad column of metal. The steel does not flex, and the edge will not buckle even when chopping into tough, interlocking grain like elm or white oak. While you would find it exhausting to push a 35-degree chisel across a tenon by hand, under a mallet it is the ideal configuration.
Setting a balanced bevel for general bench tasks
Most woodworkers do not own separate sets of chisels for every single angle. If you own a single set of bench chisels, what bevel angle should you grind on them? For general work that involves both hand paring and light mallet work, an angle of 25 degrees for the primary bevel, finished with a 30-degree micro-bevel, provides the most practical balance.
This balanced combination gives you the slicing benefits of a relatively slender blade body while protecting the absolute cutting tip with a resilient 30-degree wedge. To establish this foundation on a new or dull chisel, follow this grinding procedure:
- Establish the primary bevel: Using a slow-speed bench grinder or an 80-grit to 220-grit coarse sharpening stone, grind the primary bevel to exactly 25 degrees. Maintain a square edge across the width of the tool by keeping light, even finger pressure across the blade.
- Quench frequently: If using a dry powered grinder, dip the steel in water every few seconds. If the steel turns straw-colored or blue, you have overheated it, destroying the temper and softening the steel. If this happens, you must grind past the damaged metal to reach hard steel again.
- Flatten the back: No bevel angle matters if the back of the tool is curved. Polish the flat back of the chisel near the tip on your finest waterstone or diamond plate until it reflects light like a mirror. You only need to do this extensive flattening once in the life of the tool.
- Check for square: Place a small engineer's square against the side of the blade and against the newly ground cutting edge. Ensure the edge is square to the sides so that your cuts track straight during joinery work.
Adding a micro-bevel to reduce sharpening time
What is a micro-bevel, and why do experienced craftspeople rely on them? A micro-bevel, sometimes called a secondary bevel, is a tiny facet polished onto the very tip of the primary bevel, usually set two to five degrees steeper than the main angle. If your primary bevel is ground to 25 degrees, you sharpen the micro-bevel at 30 degrees.
The beauty of a micro-bevel is pure geometry. If you have to polish the entire 25-degree bevel face every time the chisel becomes dull, you must abrade away a large surface area of steel. Polishing that much metal by hand on high-grit stones can take ten to fifteen minutes. By tilting the chisel up by two to five degrees, you contact only the very front fraction of a millimeter of steel. Because the contact area is tiny, you can polish the edge to razor sharpness in thirty seconds.
To hone a micro-bevel efficiently using a sharpening guide or steady hands, follow this routine:
- Set the angle: Secure the chisel in a honing guide. Set the guide to register the blade at 30 degrees, which is five degrees steeper than your ground 25-degree primary bevel.
- Work the medium stone: Place the guide on a medium-grit stone (such as 1000 grit). Pull the blade backward across the stone for four to six strokes. You will see a hair-thin polished line develop at the very tip of the edge.
- Move to the finishing stone: Transfer the blade to your finest polishing stone (such as 6000 to 8000 grit). Work the edge for six to eight light strokes until that hair-thin line shines brightly.
- Remove the burr: Remove the chisel from the guide. Lay the polished back of the chisel completely flat on your finest stone. Pull it backward two or three times to wipe away the tiny wire edge (burr) created during honing.
You can re-hone this micro-bevel ten to twelve times at the bench whenever the edge begins to drag. Eventually, repeated honings will cause the micro-bevel to grow wider and wider. When it spans more than a third of the bevel face, return to your grinder or coarse stone to re-establish the 25-degree primary bevel, and begin the cycle again.
Testing the edge on pine end grain
How do you truly know if your chosen angle and sharpening routine were successful? Shaving arm hair or cutting paper tests sharpness, but it does not test cutting geometry in wood. The definitive workshop test for any wood chisel is paring the end grain of a soft wood like eastern white pine or spruce.
End grain consists of thousands of hollow cellulose tubes clustered together, much like a bundle of soda straws standing on end. When a chisel enters end grain, it does not split the fibers along their length; it must cleanly sever every single tube. Hardwoods have dense cell walls that support each other under pressure, but softwoods have thin, flexible cell walls. If your edge is dull, or if the angle is too blunt for hand pressure, the chisel will simply crush and bend these straws instead of shearing them.
Clamp a scrap block of pine securely in your bench vise with the end grain facing upward. Hold the chisel flat against the wood, bevel facing up, and push forward with light hand pressure to take a thin shaving. Observe both the severed shaving and the remaining wood surface:
- Clean severance: If your edge and angle are correct, the tool will glide through with a soft hissing sound, producing a continuous, translucent wafer of wood. The surface left behind will look shiny, smooth, and wax-like.
- Crushing and tearing: If the surface appears dull, chalky, or contains fuzzy, torn fibers, the angle is either too steep for the wood density, or the edge has not been refined sufficiently on the polishing stone.
- Edge failure: Inspect the steel after three or four cuts under a bright task light. If you see bright spots reflecting along the cutting edge, the apex has rolled or chipped, indicating that the steel cannot support that low an angle and requires a steeper micro-bevel.
Common mistakes
When woodworkers struggle with chisel performance, the fault usually lies in subtle geometric errors rather than poor technique with the mallet. Here are the most frequent errors encountered at the bench:
- Rounding the bevel during freehand sharpening: If you rock your hands while sharpening without a guide, you create a rounded, convex bevel instead of a flat wedge. A convex bevel changes the effective angle at the tip to something far steeper than intended, making push paring nearly impossible.
- Ignoring steel type limitations: Traditional plain carbon steels (like O1 or Japanese white paper steel) take a keen edge and tolerate acute angles around 25 degrees quite well. Modern high-alloy steels (like A2 or D2) contain large chromium carbides. If ground below 28 degrees, these large carbides can tear out of the matrix, causing premature chipping. Match your angle to your steel.
- Leaving the wire burr behind: Honing creates a flexible microscopic flap of bent metal on the flat back of the tool. If you do not remove this burr completely on a fine stone, it will snap off during your first cut, taking a chunk of your sharp edge with it.
- Overheating the tip on power grinders: Removing steel quickly with high-speed grinders can raise the edge temperature above four hundred degrees Fahrenheit in less than a second. Once steel loses its heat treatment, it will never hold an edge regardless of the angle you grind.
Taking control of your edges
A chisel is not a static object; it is an adaptable cutting tool whose geometry should reflect the work you ask it to do. Instead of accepting the factory angle out of the box, inspect your current tools and observe how they perform in your projects. If you find yourself leaning your full body weight into hand paring cuts, lower your bevel angle. If you notice tiny notches appearing in your cutting edge after chopping dovetails, raise the angle of your micro-bevel by three degrees.
For your next session at the bench, pick one chisel that has felt difficult to use. Mount it in a honing guide, grind a true 25-degree primary bevel, add a clean 30-degree micro-bevel on your finest polishing stone, and test it on a scrap of pine end grain. Understanding the mechanical relationship between that tiny sliver of steel and the fibers of your wood is one of the most reliable ways to make your joinery cleaner, safer, and far more enjoyable.